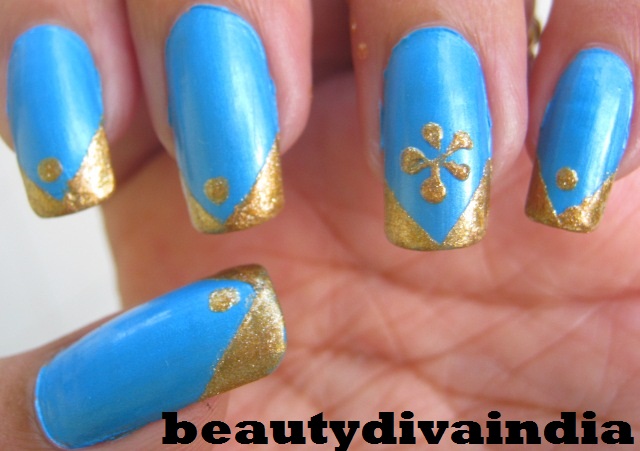


Hello beauties!!! Spring is a season when colorful and beautiful flowers come into bloom. So here is a floral nail art for you all to enjoy. I plan to come up with a few more spring inspired nail arts.
So here is the pictorial of the nail art I created for today. Enjoy.....
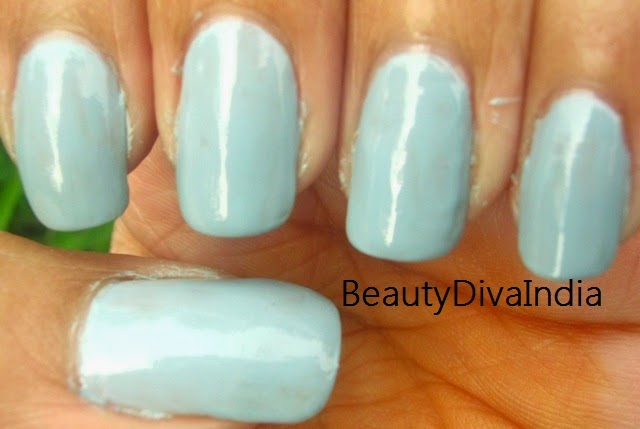
Step 1- For the base coat today I have applied a coat of Oriflame Very Me Base & Top Coat.
Step 2- After that I painted my nails with Lakme Absolute Fast & Fabulous 34 Misty Grey, two coats were enough.

Step 3- For the stripes, I used a cheap Chinese nail polish that comes with a stripper brush.

Step 4- Here I have painted the leaves with greens and the centers of flowers with blue and pink.

Step 5- I painted the flowers with blue and pink paint.

Step 6- I highlighted the flowers with corresponding lighter shades and redid the centers again.

Step 7- I added Oriflame Very Me Base & Top Coat to seal my piece of art and protect the design. Done!!!!
Thanks for bearing with me and have a wonderful Evening :)
So here is the pictorial of the nail art I created for today. Enjoy.....
Step 1- For the base coat today I have applied a coat of Oriflame Very Me Base & Top Coat.
Step 2- After that I painted my nails with Lakme Absolute Fast & Fabulous 34 Misty Grey, two coats were enough.
Step 3- For the stripes, I used a cheap Chinese nail polish that comes with a stripper brush.
Step 4- Here I have painted the leaves with greens and the centers of flowers with blue and pink.
Step 5- I painted the flowers with blue and pink paint.
Step 6- I highlighted the flowers with corresponding lighter shades and redid the centers again.
Step 7- I added Oriflame Very Me Base & Top Coat to seal my piece of art and protect the design. Done!!!!
Thanks for bearing with me and have a wonderful Evening :)