My Lovely Followers

Showing posts with label nails. Show all posts

Thursday, July 3, 2014

NAIL ART FROM A READER

                  Hello everyone, I am back after a long time. And here I have with me a couple of pics of nail art sent to us by an avid reader of BeautyDiva India. She's Aradhana Buragohain from Tezpur University. Welcome Aradhana!!!!


Floral Nail Art


Mosaic Nails


Thank you very much Aradhana for your contribution and we are expecting regular tutorials from your end. Thank you everyone and have a nice evening ahead.

Thursday, March 27, 2014

SPRINGY- FLORAL NAIL ART

                 Hello beauties!!! Spring is a season when colorful and beautiful flowers come into bloom. So here is a floral nail art for you all to enjoy. I plan to come up with a few more spring inspired nail arts.


So here is the pictorial of the nail art I created for today. Enjoy.....


Step 1- For the base coat today I have applied a coat of Oriflame Very Me Base & Top Coat.


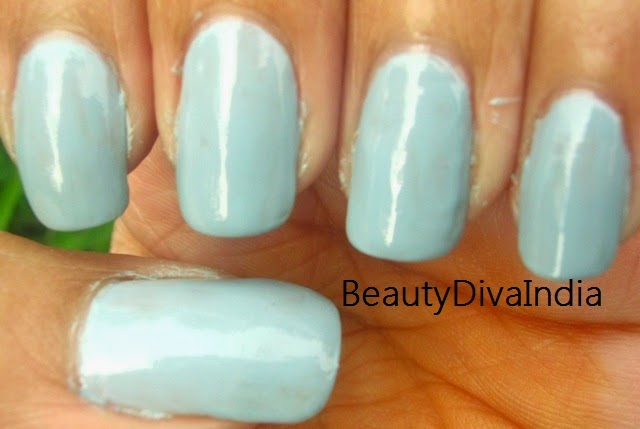
Step 2- After that I painted my nails with Lakme Absolute Fast & Fabulous 34 Misty Grey, two coats were enough.


Step 3- For the stripes, I used a cheap Chinese nail polish that comes with a stripper brush.


Step 4- Here I have painted the leaves with greens and the centers of flowers with blue and pink.


Step 5- I painted the flowers with blue and pink paint.


Step 6- I highlighted the flowers with corresponding lighter shades and redid the centers again.


Step 7- I added Oriflame Very Me Base & Top Coat to seal my piece of art and protect the design. Done!!!!


Thanks for bearing with me and have a wonderful Evening :)


Monday, March 17, 2014

HOLI INSPIRED NAIL ART WITH DOTS

                     Happy Holi friends!!! Here is yet another colorful Holi inspired nail art which is simple yet very pretty. You just need your colors and your dotting tools to recreate this design. Here I have lots of dots all over my nails in different sizes and vibrant colors. I request you not to aim for perfect dots.


So here is the pictorial of the nail art I created for today. Enjoy.....


Step 1- For the base coat today I have applied a coat of Oriflame Very Me Base & Top Coat.


Step 2- After that I painted my nails with Colorbar Nail Lacquer Exclusive 37, two coats were enough.


Step 3- I painted pink uneven dots on all the nails with the help of a toothpick.


Step 4- I painted yellow uneven dots on all the nails with the help of a toothpick.


Step 5- I added green uneven dots on all the nails with the help of a toothpick.


Step 6- I added blue uneven dots on all the nails with the help of a toothpick.


Step 7- I painted red and orange uneven dots on all the nails with the help of a toothpick again


Step 8- I added Oriflame Very Me Base & Top Coat to seal my piece of art and protect the design. Done!!!!


Thanks for bearing with me and have a Colorful Evening ahead :)


Sunday, March 16, 2014

HOLI INSPIRED NAIL ART

                             Happy Holi to my dearest readers, lovely followers and sweet friends. Holi, the festival of colors is also a spring festival. Holi marks the end of winter and arrival of spring, Holi signifies the victory of good over evil. Here is a very colorful nail art with splashes of vibrant color, my aim was to make my nails look stained with different colors but I didn't think this would be the outcome. I am not sure whether I like this design or not :P It was not possible to take pics of all the steps but I think the pics/steps given below are enough for my dear girlies to understand what's going on. Also the green looks muted and dull in the pics below, it actually is a bright green :/


So here is the pictorial of the nail art I created for today. Enjoy.....


Step 1- For the base coat today I have applied a coat of Oriflame Very Me Base & Top Coat.
Step 2- After that I painted my nails with Colorbar Nail Lacquer Exclusive 37, two coats were enough.


Step 3- I painted pink and orange uneven spot on all the nails with the help of a very fine tipped small brush.


Step 4- Gradually I kept adding the colors one by one; green, red & yellow and kept some space for blue.


Step 5- Finally I added the blue in the gaps and cleaned up the extra polish.


Step 6- I added Oriflame Very Me Base & Top Coat to seal my piece of art and protect the design. Done!!!!


Thanks for bearing with me and have a Good Night ahead :)


Sunday, February 2, 2014

PINK AND WHITE LACY NAIL ART- VALENTINE'S DAY INSPIRED NAIL ART SERIES

           Hello beauties, today I have a pink and white lacy nail art to share with you all. Continuing with the Valentine's Day Series, here I have a romantic lacy nail art. This is the 4th in the series and I have 10 more to go to complete the 14 Valentine's Day Nail Art Series. 


So here is the pictorial of the nail art I created for today. Enjoy.....


First the products used for the mani, the nail paint- Pink Doll from Lotus Herbals Color Dew Nail Enamel & Exclusive 37 from Colorbar, top coat from Colorbar and the base coat is from Sally Hansen Miracle Cure.


Step 1- For the base coat today I have apply a coat of Sally Hansen Miracle Cure.


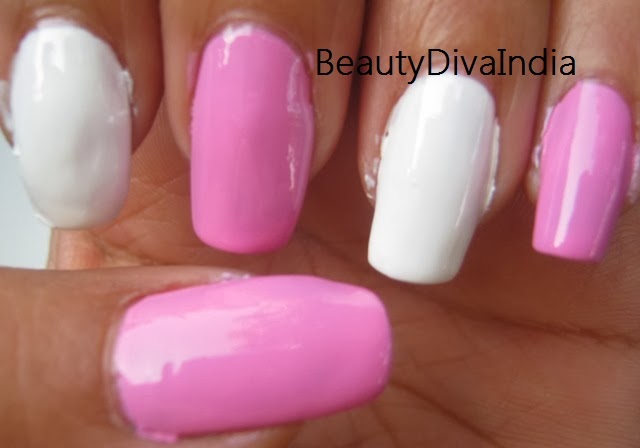
Step 2- After that I painted three of my nails with Lotus Herbals Nail Enamel in 98 Pink Doll & the remaining two with, two coats were enough.


Step 3- I painted on pink diagonal lines on the white nails and then added one more thin line over the diagonal pink part.


Step 4- I placed pink dots along the pink line and white dots along the white line. I placed smaller white dots over the pink dots and pink dots over the white ones.


Step 5- Then I drew a few hearts with white acrylics on my pinky, and some random lacy designs on the other two pink nails.


Step 6- I filled in the white designs (hearts etc) with a pale pink.


Step 7- Finally, I added a Colorbar Top Coat to seal my piece of art and protect the design. Done!!!!


Thanks for bearing with me and have a great day ahead :)


Thursday, January 30, 2014

FLORAL NAIL ART- VALENTINE'S DAY INSPIRED NAIL ART SERIES

                    Hello ladies, today I am back again with another nail art to continue with my Valentine's Day Series. Here I have a floral nail art, actually I haven't done one in ages. The flowers are basically heart-shaped and relate to the Valentine's Day theme.


So here is the pictorial of the nail art I created for today. Enjoy.....


First the products used for the mani, the nail paint and top coat both are from Revlon and only the base coat is from Rimmel.


Step 1- For the base coat today I have apply a coat of Rimmel Stronger Try Harder Double Duty Base Coat.


Step 2- After that I painted my nails with Revlon Top Speed Fast Drying Nail Enamel in 01 Sheer Cotton, two coats were enough.


Step 3- I painted on some leaves on all the nails with green, black, white & yellow acrylic colors.


Step 4- With the help of a toothpick I drew some pink, white and fuchsia hearts in and around the leaves randomly.

Step 5- Then I added dots on the bottom of each heart-shaped flower as seen in the pics.


Finally, I added a Revlon Top Coat to seal my piece of art and protect the design. Done!!!!


Thanks for bearing with me and have a great day ahead :)


Sunday, January 26, 2014

RED AND GOLD NAIL ART WITH HEARTS- VALENTINE'S DAY INSPIRED NAIL ART SERIES

                 HAPPY REPUBLIC DAY!!! Today we celebrate our 65th Republic Day but the following nail art has nothing to do with our respected Tricolor. I did one last week but unfortunately couldn't find the pics now.


Ok so continuing with the Valentine's Day Series, today I have a glittery red and gold nail art. I have incorporated a couple of hearts drawn with glitters to match the mood. I would want to post another 12 nail art in this series and it is possible only with your love and support. 


So here is the pictorial of the nail art I created for today. Enjoy.....


First the products used for the mani, all nail paints are from Colorbar (another coincidence...lol)


Step 1- Single coat of Sally Hansen Hard as Nails as the base coat.


Step 2- Two coats of Colorbar Exclusive Nail Lacquer - 
46 on the nails (thumb, midlle & pinky).

Step 3- Two coats of Colorbar Metallic Nail Lacquer - 011 Treasure on ring & index finger nails.


Step 4- I sponged a little metallic gold on the tips of the red nails and evened it out with a glittery gold polish using a stripper.


Step 5- I placed chunky gold glitters on the tips of the 3 red nails for more bling.


Step 6- I placed red chunky glitters in the shape of a heart on the ring finger nail 2 halves of hearts on the index and filled up the hearts with gold chunky glitters.


Step 7- Finally Colorbar top coat to add gloss and seal in the art. Done!!!!


***Sorry for not cleaning up before clicking :P


Thanks for bearing with me and have a great evening :)


Wednesday, January 8, 2014

FRENCH MANICURE WITH RED HEARTS- VALENTINE'S DAY INSPIRED NAIL ART SERIES

                         Happy New Year 2014 everyone!!!!!  So how is the first week of your new year going? Mine is going pretty good. Since long I have been trying to do a series of nail art but due to some problem or the other I could not do a series. So let's see if I can keep up to this self challenged series of Valentine's Day Nail Art Series.

                     Today I am starting with a simple french manicure with tiny hearts to warm up the Valentine mood. I am planning a series of 14 Valentine's day inspired nail art. I need your love and support to keep up with this self-challenge.


                     Here is the pictorial of the nail art I created for today. Enjoy.....


First the products used for the mani, all nail paints are from Colorbar (just a coincident...lol)


Step 1- Single coat of Sally Hansen Hard as Nails as the base coat.


Step 2- Two coats of Colorbar Pro Nail Lacquer - Baby 011 on the nails.


Step 3- French tips with Colorbar Exclusive 37, a pure white polish.


Step 4- Used a toothpick to make tiny hearts on the french tip with Colorbar Exclusive 46.


Step 5- You can apply Colorbar Pro Glitterati Top Coat in Disco Gold but chose to keep it simple.


Step 6- Finally Colorbar top coat to add gloss and seal in the art. Done!!!!


Thanks for bearing with me and have a beautiful day :)


Thursday, November 28, 2013

CHRISTMAS NAIL ART WITH POLKA DOTS

                  Hello everyone, Christmas is here and so are the parties. Here I have a nail art which I have taken inspiration from pinterest but its quite different from the original one. I am not a pro and here I have tried my best. I liked the way it came out but you can go ahead with a glitter top coat if you desire. Hope you all enjoy the pictorial


Step 1- Single coat of Sally Hansen Hard as Nails as the base coat.

Step 2- Two coats of Colorbar Exclusive Nail Lacquer - Iced Spice on the nails.


Step 3- Red & green polka dots. Red- Avon Simple Pretty Nail Enamel Royal Red & Green- Avon Nailwear Pro+ Nail Enamel Noir Emerald.


Step 4- Red french tip, they don't need to be neat.


Step 5- A green line to cover up the mistakes of the red french tips, using a stripper.


Step 6- Finally the top coat to add gloss and seal in the art. Done!!!!


Thanks for bearing with me and have a beautiful day :)


Monday, November 11, 2013

AVON NAIL EXPERTS VITAMIN C CUTICLE GEL- REVIEW


15 g for INR 149

Avon Says: - Avon NAIL EXPERTS Vitamin C Cuticle Gel instantly repairs dry cuticles, moisturizes the skin around nails and infuses it with nourishing vitamin c. The refreshing cream with rich citrus scent will keep your hands nicely smelling, soft and smooth.


To Use: Apply a small amount to cuticles, massage gently. Wipe any excess product.


Ingredients: - Water/Eau, Glycerin, Dipropylene Glycol, Cyclopentasiloxane Dimethicone, Sodium Chloride, Butyrospermum Parkii (Shea Butter) Extract, Ascorbyl Palmitate, Tocopheryl Acetate, Ethylhexyl Palmitate, Isopropyl Myristate, Petrolatum Peg/Ppg-20/15 Dimethicone, Parfum/Fragrance, Imidazolidinyl Urea, Polyethylene Dimethiconol, PPG-5-Ceteth-20, SD Alcohol 40-B, Retinyl Palmitate, Tocopherol, Yellow 5 Lake/CI 19140, Red 30/CI 73360, Orange 4/CI 15510


My Opinion: - Long back I bought this Nail Experts Vitamin C Cuticle Gel from Avon when it was launched. It was priced at Rs 79 (special introductory price) and I immediately grabbed one as I thought I have nothing to lose. I used it daily twice for 20 days without much expectations and I observed my cuticles much well behaved, the roughness and dryness was gone!!!! I immediately called upon the Avon lady and placed an order for more. Thankfully in the next catalog also this awesome product was priced Rs 79 so I asked her to get me 3 more. And there began my love affair with this cuticle gel. Oriflame also had a similar product with similar Nourishing Nail Serum which I loved too but it was discontinued. I have finished off a number of tubes of this cuticle gel and just now I realized that I have not shared this awesome product with you all. So here I am putting forward my views on this product I adore.


                       Now the packaging of this gel is very catchy, a bright orange see-through tube with a white screw-on cap. But it comes boxed in a black carton like most Avon product. Upon opening the white cap, you shall find a thin long nozzle to dispense the product right onto the cuticles. The gel is a transparent pale orange with bright orange beads that melt away upon slightly massaging. This gel is basically fragrance free as I have never been able to detect much scent in it. Only in the first few days of opening the tube, I get a faint orangey kind of scent but it is gone after a week of usage. The gel is watery and very light weight and does not make a mess of my hands. My cuticles are rough and dry but not damaged and therefore I began with using it twice a day, in the morning and at night but now I use it only in the day time after using my hand cream. My hands feel dry as I sit in an air conditioned office whole day and I keep a hand cream handy. 


                       But after using this gel every day, my cuticles have softened and the roughness is gone. The nails as a whole appears to be more healthy and clean without any of those unsightly peeling off cuticles. I use an excess of nail paints & paint removers, that's the main reason for my dry cuticles both on finger nails & toe nails. But using this has improved the condition of dry and hard cuticles on my toe nails and dryness and hangnail on my finger nails. I just apply a small dot onto each cuticle and massage it on for a while and done. No greasy residue or oiliness is left behind, I do not feel the need to tissue off the remaining gel. Actually the gel gets absorbed into the the skin quite fast and being a non-oily light-weight formula it is mess free and hence it is mess-free and I prefer to use it during the day time. Out and out a great nail care product, there is a dearth of good nail care products as most big Indian brands don't have nail care stuff. Avon scores here with this cuticle gel.


Pros:


* Cheap

* Very effective on my cuticles

* Light-weight, oil-free gel formula

* Mess free as it gets absorbed into my skin very fast

*  Contains Shea Butter known for its moisturizing properties & Vitamin C known for to treat nail dryness (dry cuticles & hangnails)

* Can be used during the day while working, this gel will not stain yor precious dox or mess up your lappy

* Doesn't feel sticky

* Gives results in short time with regular use

* Makes nails healthy and lovely


Cons:


* Availability is an issue as Avon consultants are hard to come by

* Avon has the knack of discontinuing its best products!!! What if they chose to take this Cuticle Gel off the shelf just like Oriflame did???


                      I rate Avon Nail Experts Vitamin C Cuticle Gel 4.75 out of 5. My nails are not damaged but overuse of nail paints and removers definitely has its toll on them. My toe nails are comparatively much drier than my finger nails and this adorable Cuticle Gel helped combat the dry dry cuticles on my toes too. So I would say that it is one of the most effective treatment I have ever used. Highly recommended for all beauties who love their nails and wants to have pretty lovely nails. One of the best products from Avon I have ever tried!!!


Hope this review helped you in some way and do leave behind your sweet comments and also tell us about your experience with Nail Treatment Products. Thank you and have a wonderful Monday :)


Related Posts Plugin for WordPress, Blogger...